
Do you ever wonder why the brakes on your bicycle are not as effective as it used to be? Are you seeking for the best cure for fading or contamination? Or do you just desire the strongest, most dependable stopping power for the longest time possible?
If you want your disc brakes to stop softly, consistently, and forcefully, you must keep them clean. However, there are many different opinions on how to clean brake pads, so we sought the counsel of several business experts.
Why Do Brake Pads of Bicycle Gets Grimy?
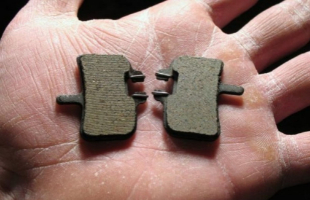
Greasing brake pads is an awesome way to make your brakes keep going. The most common cause of this is when brake pads get dirty as a result of absorbing grease or oil from the ground or lubricating the gearbox. Because the pads are porous, this oil impregnates them and produces a film that drastically reduces braking power. This dirt is also usually the source of unpleasant noises. The first step to take in such a case is to evaluate whether the brake pad still has any braking surface and, if so, to remove it from the brake caliper.
Is It Better to Clean or Replace Brake Pads?
We have two alternatives now that we have the brake pads: replace them directly or attempt to clean bicycle disc brakes. If we choose the second option, we should learn how to clean bike brake pads. Go through the following steps in order to know the steps of cleaning brake pads:
Step 01: Making sure our hands are clean will be the first thing we do after removing the caliper and the brake pads. There are times when changing pads with filthy hands causes them to stay dirty forever.
Step 02: Clean hands should be used to clean the surface layer of the brake pads first (it is recommended to handle them while wearing gloves). Cleaning disc brakes with alcohol have been around for quite a time. To achieve this, use an alcohol-soaked swab. Following the completion of this step, we will commence the comprehensive cleaning bike brake discs.
Step 03: We will massage the surface of the pads with fine-grit sandpaper, taking care to rub them in a consistent pattern. When we’ve finished cleaning the dirty layer, we’ll run a moistened towel over it one more time to remove any lingering dust.
Step 04: It’s the dry season. We may use the alcohol-soaked pad to apply heat to it using a lighter, enabling the excess alcohol to evaporate and the pores to widen. At this stage, the tablets just need to be degreased, washed, and dried.
Step 05: Before reassembling the brake discs and calipers, make certain that those are free of grease and oil. You can help yourself by wiping some alcohol on another clean towel.
Step 06: After we are positive that all of the components are dry and clean, we may reassemble the pads and clamps. It’s time to assess the outcome of our efforts. After fitting our brake pads, it is recommended that you brake momentarily in the dry to allow them to adapt completely, which may still shriek at first.
What’s The Most the Effective Way to Service Your Brake Calipers?
To know how to clean brake pads or how to clean brake calipers properly, you will need to know what tools are required. With this extensive lesson, you’ll learn how to keep disc brake calipers and pistons clean, so they may continue to work at their best. Disc brake calipers and pistons can get dirty and inefficient over time.:
Tools Required
- Needle pliers
- Large flat screwdriver
- Fine brush and a pair of earbuds
- Grease (Silicone)
- Hex keys
- Degreaser
- Paper cloth
Step 01: The specific technique varies by brand, but removing the wheel from the bike and the pads from the caliper is always as simple as removing a pin or bolt. Visit the website of your brake manufacturer for further information.
Step 02: Press down on the brake pedal until one or both pistons are exposed 3 to 4 mm or more. You’ll need to bleed the braking system if you push them out.
Step 03: After cleaning the brake pads of the pistons with a spray cleaner and a paper towel, add silicone grease to the outside edge using a brush or earbud. If both pistons can be released, a hydraulic piston press tool (or a wide-bladed screwdriver wrapped in a paper towel) can be used to reconnect them to the caliper. In either case, take care not to scrape the surface of the pistons.
If only one piston was released by pulling the lever, use your hydraulic piston press tool or screwdriver to retain the remaining piston in the caliper and pump the brake lever to reveal the second piston after cleaning, lubricating, and press the liberated piston in. Apply the same cleaning procedures to this piston, lubricate it, and press it back into the caliper.
Step 04: After cleaning and lubricating both sides, use a degreaser and a paper cloth to wipe the interior of the caliper.
Step 05: When you’re positive that no grease remains, it’s time to return the pads. If the pads are clearly worn out, have the friction material too close to the rear plate, or have considerably uneven wear, replace them. See the video below for details on how to accomplish this.
Step 06: Install the brake pads in the caliper and double-check that the brake is properly set up, with the rotor running centrally in relation to the caliper body rather than the brake pads. If it isn’t, realign your calipers.
Step 07: Pumping the brake lever many times will reset the pad position. If your brake lever seems mushy, you may need to bleed them.
Is Disc Brakes the Same as Break Pads?
No, a disc braking system comes with brake pads. The phrase “disc brake” refers to a system in which brake pads are pushed together against a rotor disc by a caliper. Although disc brakes are excellent, it may be a tremendous pain if incorrectly mounted or maintained. Modern disc brakes are trustworthy and long-lasting components, but keeping them in excellent condition requires regular cleaning. Here are some things to consider before putting oil on brake pads. Disc brakes despise all sorts of oil; even the natural oil on your skin is enough to reduce braking efficacy. As a result, be cautious when washing your bike, and avoid using aerosol sprays near your brakes or touching the rotors with your bare hands. Here are a few pointers and resources to consider for knowing how to clean bike disc brakes:
- Clean Cloths: In this case, an old, clean T-shirt, towel, or something similar will suffice; all that is necessary is that it be lint-free. We always keep a roll of paper towels on hand for brakes, so there is never any doubt about whether or not it is clean.
- Cleaner: Aerosol disc brake cleaners for bicycles are widely available, and most of them are quite effective, if not a little too potent. A brake cleaner is designed to remove dirt, grease, and oil with no residue. Isopropyl alcohol can be found at pharmacies and grocery stores as a replacement. This well-known antibiotic is suitable for safe brake cleaning. Most brake manufacturers recommend it since it will not dry up the sensitive piston seals, even if it isn’t as good at cutting through the dust.
- Pad Setting (Spacer): A pad spacer is useful for resetting the brake pads before adjusting them or resetting the brake pads after an inadvertently pressed lever with the wheel removed. This is required while going without your wheels. A piston press is a workshop version of this that is available from a variety of tool makers. Although this is useful at a store, it doesn’t accomplish much more than the free plastic equivalent. These plastic pad spacers are often included with your bike or brakes, but you may get one by gently asking your local shop technician.
- Fork (Rotor Truing): Disc brake rotors typically deform as a result of bicycle transportation or high heat. An uneven rub, ping, or shing on each wheel revolution often indicates that something must be sorted. Rotor truing forks are simple metal forks with slots that fit onto the rotor for precise bending leverage. When combined with a clean towel, a clean adjustable wrench or even your thumbs are less expensive options.
- Light Touch: Okay, so this isn’t a mechanics-related question. If you’re having problems seeing between the brake pads to establish what’s causing the rubbing, flashing a low-brightness (cheap) flashlight into the back of the caliper will emphasize the problem. A white piece of paper placed on the opposite side of the caliper from where you’re looking is a more common option since it creates a clear, bright background that may be utilized to spot faults.
- Sandpaper: Brake pads (and rotors) can become glazed over when braking efficacy deteriorates. Remove the pads and gently scrape them against a clean sheet of sandpaper to make a quick repair. You don’t want it to be too fine, so grit of 120 or less would suffice. I cut little pieces as needed to keep the rest of the sheet clean.
- Blow Torch: Although it is risky, employing a blow torch to revive weakly stained brake pads is an option (in conjunction with sandpaper). If you’ve sprayed oil or grease on brake rotors and pads, give up; if you haven’t, simply give it a shot. Just be careful not to burn down the house! Another key safety precaution is to avoid baking the brake pads until it reach a bright red color. Replace the brake pads if in doubt. This heat level may harm the connection between the brake pad surface and the backing plate. If burning and sanding the brake pads doesn’t help, it’s time to replace them and make sure your rotors are very clean (in certain rare cases, you’ll need to replace them as well).
To Sum Up
- Keep sprays away from your bike and/or remove your wheels while cleaning or lubricating it to avoid contamination.
- Clean your brake system with normal soap and water.
- Instead of using white spirit to clean your rotors, use isopropyl alcohol, meth, or another solvent that does not leave a residue.
- If you want to use a bike-specific brake cleaning spray, get one and avoid putting it on the seals on the lever and caliper.
- While contaminated pads should be replaced, a tiny quantity of sandpaper may be sufficient to correct minor surface flaws.
We hope these ideas and advice will help you keep your integrated disc braking system, particularly the brake pads, in good working order every time you embark on an excursion. We hope now you know how to clean brake pads.
From getting knowledge about bikes and bike-related accessories, you can contact us without taking any hassle. We are always open for you to make your buying decision more perfect. Thank You!